Sunday, October 16, 2011

MAC Holiday Collections 2011 Preview (my experience)!

So I just thought I'd fill you guy in on my first impressions for the upcoming MAC Holiday Collections!

Today (October 16th) I went to my MAC counter and I was chatting with one of the associates and I was talking about how I'm saving money for the Holiday collections. She then told me that they have the collections for preview in a special room and I could go swatch and play with the products if I wanted to.

Uhhh, DUHHHH!


So she took me to the back room and there was amazingness in there. I happen to LOVE the white packaging of the products. I think it looks very Holiday-ish and it just reminds me of snowy weather and such (as if we get that kind of weather in California)! xD

The things that stood out to me in the collection were the Paint Pots (which were all gorgeous). The pink one (sorry I don't know the names of any of these, but Temptalia has many posts up about these collections, so it shouldn't be too hard to find out the names) is probably my favorite out of the three. Nonetheless, I'll probably be getting all three of the Paint Pots.

Another thing that stood out to me were the Mineralize Eyeshadows. Now I originally didn't think I would be getting any of them, but I think I'll probably pick up a few of them. There was this GORGEOUS mint green/turquoise shade which I was IN LOVE with when I swatched it. The only thing about them is that they have unnecessary, chunky glitter in them. This will make them harder to use, but definitely not impossible.

The Dazzleglasses were all very pretty, but they didn't seem to be super unique shades (at least, from what I remember).

There was a Nail Lacquer which is very reminiscent of the Deborah Lippmann Stairway to Heaven nail polish. I'm not sure if it's an exact dupe, but it's pretty close from what I could tell.

The eyeshadow palettes were pretty, but I'm still iffy on them. I wasn't impressed with last year's eyeshadow palettes, but hopefully this year will be an improvement.

Unfortunately, I wasn't able to spend too long in that "special room" with the preview items in it, so I couldn't swatch everything I would have liked to. I do think I got a general idea on what I'll be getting from the collection, so I'm happy I was able to check it out.

Is there anything that you are for sure putting on your wishlist from these upcoming MAC collections? Be sure to let me know in a comment below, on Twitter, or on my Facebook page! 

Love you guys and I'll type to you in my next post! <3
Eshani a.k.a. TotalMakeupJunkie101

Saturday, October 15, 2011

Nail of the Day: OPI Swimsuit...Nailed It!

I've mentioned in many videos that blue nail polish has been my current obsession. Well, let's just say that out of the 80 or so blue nail polishes I own, this is my all-time favorite!

Swimsuit...Nailed It!, two coats, natural light
OPI absolutely, without a doubt, nailed this shade. The name pretty much says it all. Swimsuit...Nailed It! is a dark blue that is still very vibrant, almost glowy. It's so bright that I think it almost takes away from the darkness of the shade in the bottle. I feel like the true color is a lot more vibrant and impressive on the nail than it is in the bottle.

This is definitely a shade that I would recommend trying on before judging it. I know many people will pass it up thinking it's too dark for their taste, but in my opinion, it is the PERFECT royal jewel-tone blue.

What do you guys think of Swimsuit...Nail It!? Are you itching to dash to your beauty store and grab a bottle or could you not care less about the shade? Let me know!

Love you guys and I'll type to you in my next post! <3
Eshani a.k.a. TotalMakeupJunkie101

Monday, October 10, 2011

Nail of the Day: Butter London Wallis


There is only one word to describe this polish: magnificent. This polish is absolutely breathtaking, especially in the sunlight. I don’t think my picture does it much justice, so if at all possible, I would recommend going to see it in person.

Wallis, two coats, natural light
Wallis is a vibrant olive gold with a very shimmery (almost metallic or foily) finish. It actually is almost a duo-chrome, and looks very green in some lights and very golden yellow in others. Honestly, I don’t have ANYTHING like this polish in my collection. Very unique and also very trendy at the moment. The ugly-pretty shades are very “in” right now.

Butter London polishes are available in Ulta and Nordstrom stores, as well as online. They retail for $14 each, which I personally think is pretty high for the quality and quantity you get. Wallis is probably one of the very few polishes from Butter London which I wouldn’t mind shelling out $14 for. Many of the others, on the other hand, could easily be duped and skipped.

What do you guys think of Wallis? Are you itching to dash to your Ulta and grab a bottle or could you not care less about the shade? Let me know!

Love you guys and I'll type to you in my next post! <3
Eshani a.k.a. TotalMakeupJunkie101

Saturday, October 1, 2011

Nail of the Day: Revlon Facets of Fuchsia


So I think I’ve found my new holy grail Fall/Winter nail polish. Seriously, the beauty of this polish is so hard to capture in a picture, but it is indescribably beautiful in person. This is one of Revlon’s new (and I don’t believe that it’s limited edition) shades called Facets of Fuchsia.

Many people have been comparing this polish to the infamous, Deborah Lippmann Bad Romance nail polish (named after Lady Gaga’s song). I was one of the many who lusted over this polish ever since it released, but $18.00 for one bottle of polish was definitely not in my price range. Luckily, Revlon heard our cries of sorrow and came to our rescue. And so Facets of Fuchsia was born.

Facets of Fuchsia, two coats (over black), natural light
Facets of Fuchsia is an almost jelly, deep charcoal (almost black) base with fuchsia-purple glitter. There are two distinct shapes of the fuchsia-purple glitter in this polish: hexagonal and little specks. Surprisingly, the glitter is not hidden behind the dark base of the polish; instead, it shows up quite well and provides a beautiful contrast against the dark background.

Another note about this polish is that the base is sort of a jelly consistency, meaning that it is not opaque in one coat and still only semi-opaque in two coats. If you were to wear this polish alone, I would recommend applying three coats. One way around that (which is what I did in my manicure) is to apply an opaque black crème polish first, and then apply one to two coats of Facets of Fuchsia over it. This really bumps up the intensity of the polish and I found this to be the most efficient use of it.

One last note I want to make about this polish is that if you apply it over a black crème polish, you do not need to apply to coats of Facets of Fuchsia. My intention was to apply two coats of Facets of Fuchsia in an attempt to maximize the amount of glitter visible, however this does not work. I found that the second coat merely covered up the glitter of the first coat (because of the darker base) and it basically looked exactly the same as if I had only one coat of it on. So my recommendation would be: one coat of base coat, one coat of an opaque black crème polish, one coat of Facets of Fuchsia, and one coat of top coat. You’ll get the exact same look as mine if you follow these steps. ;)

What do you guys think of Facets of Fuchsia? Are you itching to dash to your drugstore and grab a bottle or could you not care less about the shade? Let me know!

Love you guys and I'll type to you in my next post! <3
Eshani a.k.a. TotalMakeupJunkie101

Monday, September 26, 2011

Nail of the Day: Butter London Blagger


So I know I’ve been majorly slacking on this blog, and I really need to fix that! I figured that some posts that I would be able to write and publish quickly would be Nail of the Day posts. Just take a few pictures of your manicure, write what you think of the polish, and it’s ready to go. So I think I’ll be doing many Nail of the Day posts on this blog (so I’m sorry if you’re not interested in nail polish).

As most of you guys know, I’m a nail polish junkie. The obsession is growing so quickly that I think it’s quickly equaling (if not overtaking) my obsession with makeup. *shocked face* This is why I want to dedicate a good amount of time into some nail polish posts. Hopefully you polish-aholics out there will enjoy them!

Okay, so now to the point of this post. Last night I decided to paint my nails a shade from a brand new brand of nail polish (at least, to me): Butter London. I’ve never tried Butter London’s polishes before, and at $14 a pop, they are relatively pricey. The only thing that persuaded me into buying a few (as in 14) Butter London polishes is the recent BOGO Free they had at Ulta. All of the Butter London polishes were Buy One Get One Free for one day only. Luckily, an Ulta opened up right near my house less than a month ago, so I was luckily able to participate in this amazing deal.

The polish that we’re talking about in this post is Blagger: one of Butter London’s most underrated nail polishes (in my honest opinion). I don’t hear much talk about Blagger, so it wasn’t one that I even considered getting when I heard about the BOGO Free sale at Ulta. The thing that convinced me to get this polish was Ingrid’s (Missglamorazzi) Twitpic of this polish on her nails. It looked BEAUTIFUL in that picture, and it is!

Blagger, two coats, natural light
 Blagger is basically a crème royal blue. It’s dark enough to be worn during the Fall and Winter, but not so dark that it would look out-of-season for Spring and Summer. It’s the perfect royal blue crème polish. The only other thing that I have in my collection that you could compare (which I honestly wouldn’t, because they’re so different) is Zoya’s Breezy. Breezy is much lighter, and I’m actually not a huge fan of that polish on my skintone. I really think Blagger looks amazing on my skintone, but I definitely think it’s universally flattering.

One other thing to note about this polish is that the formulation is literally like BUTTER. It goes on perfectly. Smooth, opaque in two coats (but you could even get away with one if you wanted to), and so easy to apply. I highly recommend this polish. Love it!

What do you guys think of Blagger? Are you itching to dash to your Ulta and grab a bottle or could you not care less about the shade? Let me know!

Love you guys and I'll type to you in my next post! <3
Eshani a.k.a. TotalMakeupJunkie101

Saturday, August 27, 2011

Are You Ready for Halloween? Sally Hansen Has You Covered!

Sally Hansen has outdone itself when it comes to Halloween cuteness! The company has released five new, limited edition prints of their infamous Salon Effects Real Nail Polish Strips. All five of these prints have a Halloween theme, and honestly, I think they’re so dang cute.
I found mine at Walgreens, but I’m sure CVS, Rite Aid, and those drugstores should be getting them in, as well. These are on a separate display, which you’ll be able to find where all the other special nail polish and makeup displays are. Each display only has two of each design, so if you want one of these, I would recommend checking your nearest drugstore soon. The retail price on these is $9.99, which I do find to be ridiculously high. The only reason I shelled out the money on these (usually I wait for a bogo sale) is because I’m a total sucker for anything cute and Halloween-themed.
Out of the five that were on the display, I only ended up grabbing two. These are the two that, in my opinion, are the cutest. The other ones are a little more edgy…still very wearable, but more “on the edge”, if you know what I mean. 

The first one I didn’t get is Numbskull, which is essentially a black skull and crossbones design against a plain white backdrop. Skulls, in general, are just not my cup of tea. I don’t care for them very much, so I skipped this design.
The other design I didn’t get is Wishnets, which is a black fishnet design against a red backdrop. This one was interesting…I didn’t care for the color combination too much, but if I ever change my mind about that, I can easily replicate this look using my Konad.
The last design I didn’t get is Hot Wired, which is a black barbed-wire design against a bright lime green backdrop. I actually was anticipating getting this design as well as the other two, but in person, I felt like the barbed-wire look didn’t come across as well as I had hoped for. It also felt like something I could easily replicate using my Konad.
And now onto the fun part: what I did buy! =D

The first design I bought is Spun For You (such a cute name for such a cute design!). This design features a black spider web over a sparkly, metallic silver backdrop. I LOVE the color combination of this design. I’m so glad they didn’t put a black spider web over just a plain white backdrop. The metallic silver gives this design some added dimension, which I love. Now though this design may be able to be recreated using a Konad, I don’t own a stamping plate that has a full-nail spider web on it. So this was unique to my collection.

The second design I bought is Ghoulie Girl (another adorable name). This design features both white and orange ghosts over a black backdrop (though the backdrop is barely visible since this design is LOADED with ghosts!). This design is my favorite out of all five that were released in this limited edition collection, and I also think this one will be the first to sell out. This design is by far the most intricate out of the five that were released. There is no way that this could be done free-hand, or even using the Konad. I LOVE this one.

In the package, you get 16 nail polish strips (in various sizes), a mini orange stick, a mini nail file, and an instructional guide. The instructions are very easy to follow along with, so I don’t think that should be of concern to anyone. The 16 nail polish strips are packaged in two separately sealed packages with 8 nail strips each. Now there is a good and bad side to this. If you have medium-length to short nails, you can actually double-up the nail strips (meaning you use one nail strip for two nails). I’m able to do this with my length nails without a problem. What I do is just cut the nail polish strip in half using scissors and then use one side for a finger on my left hand, and one for my right hand. By doubling-up the nail polish strips, you actually only have to open one packet (containing 8 nail polish strips), and you can use the other packet for another application. This means you get two applications for the price of one (because technically these are supposed to be a one-time-use product).


Now I’ve been getting SO many questions about what I think of the Sally Hansen Salon Effect Nail Strips. Personally, I think they’re a very good product. This is perfect for those who don’t have time to sit and paint their nails and wait for them to dry. Since these are just nail polish strips, there is no dry time. These are also very easy to remove with regular nail polish remover. It melts away just like regular nail polish. This product is an easy way for even regular consumers to get cute patterns on their nails without having to go to the salon and pay outrageous prices.
As much as I like these polish strips, there are some cons to this product as well. Though it claims to last for “up to 10 days”, I’ve never been able to keep mine on for longer than seven. After that, it starts peeling and chipping, and it just looks like a mess. Also, I find that these last MUCH longer WITH a topcoat. Though the instructions claim you don’t need to apply a topcoat, I find that these peel within a day or two without one. This is particularly unfortunate because it invalidates the fact that there is “no dry time”. If you have to apply a topcoat to the nail polish strip, you have to wait for it to dry. There’s no getting around that.
The last, and probably the most annoying, of the cons is the fact that these nail polish strips dry out if you don’t use them within a matter of hours. As I said earlier, these nail polish strips come in two separate packets of 8 strips each. If you don’t have short enough nails to be able to double-up on your application, then you have to open both of the packets. So this means for 10 nails, you are using 16 nail strips. You would not be able to save the strips once you open the package that they’re in, because since they’re made of real nail polish, they will dry out and they won’t stick to your nails anymore. That makes me sad and I feel like that’s pretty wasteful.

Overall, I really like these Sally Hansen Salon Effects Real Nail Polish Strips. I find they last a decent amount of time on your nails and they look super cute. I do wish the price was reduced a bit, because $10 for a one-time-use product seems excessive. But since I’m able to get two uses out of it, it seems more worth it for me. But either way, I HIGHLY recommend these Halloween designs. They’re unbelievably cute AND limited edition, so jump on them as soon as possible! I promise, you won’t regret it. ;)

Love you guys and I'll type to you in my next post! <3
Eshani a.k.a. TotalMakeupJunkie101

Friday, August 26, 2011

China Glaze Metro Collection for Fall 2011

So a week or so ago, I posted on Twitter asking what you guys thought of the new China Glaze Metro Collection for Fall 2011. Many of you guys said there were some standouts in the collection, but for the most part, the collection was a skip. I perused swatches online by some of my favorite beauty bloggers and came to the conclusion that I needed some of these shades in my life.
I ended up placing an order on Head2toebeauty.com. This is one of the multiple online nail etailers. I used to order from Transdesign.com, but after a horrible personal experience dealing with their customer service, I’ve moved on and will never order from them again.
Anyways, let’s get back on topic. ;)
This collection is a PERFECT Fall collection. I don’t know what else to say about it. It has a little bit of everything. Dark shades, light shades, cream finishes, shimmer finishes, glitters, everything. It really is a perfect collection. Now though I didn’t order the entire thing, I can tell you that the polishes that I did end up getting, I am very happy with. Not even one dud shade to report here.
So let’s get on to the shades:
First off, the Metro Collection was broken down into two sub-collections: Uptown and Downtown. We’ll start with the polishes I got from Uptown.
 
Left to Right: Brownstone, CG in the City, Street Chic, Urban-Night

Brownstone is a darkened burgundy brown with a cream finish. This shade is incredibly opaque and the texture is rich and buttery. The shade is also fairly unique, but I do think I have an OPI polish that is fairly similar. I can’t remember the name off the top of my head, but I believe it was in the Hong Kong Collection.

CG in the City is a clear base with tiny particles of purple-y pink glitter. The glitter in this polish is very fine, yet it is still fairly dense. In three coats, you can get fairly opaque coverage. It’s not quite as opaque as OPI’s glitters, however.


Street Chic is a cocoa brownish taupe with a cream finish. This shade also has an incredible texture, as it’s very smooth and becomes practically opaque in one coat. When I was applying this polish, it really reminded me of a steaming cup of hot chocolate. The smoothness of the cocoa mixed with the velvetiness of the milk is all captured in this polish. Oh, what a strangely descriptive description. ;)


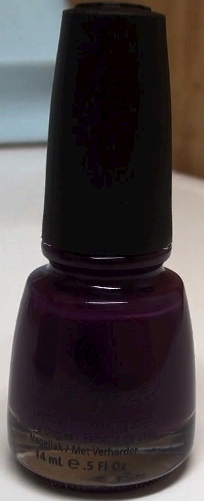
Urban-Night is a darkened plum with a cream finish. The texture on this one is very nice as well: opaque in one to two coats and very buttery. However, I didn’t find the shade terribly unique. I’m sure I have many other polishes that can substitute for this one. So if you already have a dark plum polish in your collection, I would skip on this one.


And now for the polishes I got from the Downtown sub-collection. This collection definitely had more unique and interesting shades in it.

Left to Right: Concrete Catwalk, Midtown Magic, Skyscraper, Trendsetter, Westside Warrior
 
Concrete Catwalk is a dark blue-toned grey with a cream finish. This one also had an amazing formulation: exactly the same, dense color payoff as the other cream polishes in this collection. This shade is very pretty, however this is another not-so-unique one. I had just bought Essie’s Power Clutch from the new Carry On Collection a few days ago, and CC is virtually identical to it when swatched.


Midtown Magic is a blackened purple base with slight multi-colored shimmer in it. The texture is very smooth on this polish. I also found this polish to be one of the most unique out of the collection. I definitely recommend snatching this polish if you have a chance.


Skyscraper is a sheer mid-tone blue base loaded with silver glitter. The glitter in this one is similar to CG in the City, but because this polish has a colored base, it goes opaque in two thick coats. I personally LOVE this polish. I can’t stop looking at it. Very unique to my collection, and I think it should be a great addition to any nail polish lover’s collection. By far my favorite polish promoted in the Metro collection.


Trendsetter is a mustard yellow with very subtle gold shimmer. This is another very unique shade, and definitely going to be one of those “love it or hate it” type of shades. If you are daring with your nail polish choices, definitely give this one a go. If not, then I would pass. Personally, I think it’s BEATIFUL, but to each his own. I know not everyone will find this shade to their liking.


Westside Warrior is a dirty army green with a cream finish. This one was not quite what I was expecting. It’s very dark and dirty looking. A good fall color, but I was hoping for something a little lighter and brighter. Overall, I’m not too disappointed in this shade. The texture is amazing (once again) and I think if you are looking for a very dark green, that almost doesn’t look green, you may like this one.


So overall, I’m very impressed with this collection. I think China Glaze hit it out of the park when it comes to the textures of these polishes. Each one of them smooth, buttery, and opaque. Love them.
The ones I didn’t get from the collection were the three red and pink shades. I believe there was one red and two raspberry-pink shades. I honestly do not need one more red or pink nail polish, so I just decided to pass.
Fall is right around the corner and I can’t wait to wear all of these beautiful polishes. I hope you guys liked my haul and review on this collection, and please feel free to let me know what you think of the collection. Are you planning on getting any of these? Did you already get some? If so, what do you think of them? =)
Love you guys and I'll type to you in my next post! <3
Eshani a.k.a. TotalMakeupJunkie101

Thursday, August 25, 2011

MAC Me Over Collection Haul, Review, and Swatches

MAC has definitely outdone itself with this collection. MAC Me Over is a HUGE Fall 2011 Collection featuring 51 products. More than likely, you will find something to your liking in this collection. Though the collection features mainly neutrals and understated shades, there are definitely some gems that are not to be overlooked in this collection. My haul was fairly small (at least compared to the MAC hauls that I’ve done in the past), but I’m still very pleased with the items I decided to grab.
I knew that I wouldn’t be able to get too much from this collection because MAC has many more collections that are still to be released in the next few months. Am I the only one who’s still trying to keep up with these collections, but is failing miserably? Anyways, I am looking forward to the Posh Paradise collection with all of the Paint Pots. And I’m also looking forward to the new Viva Glam launch featuring Nicki Minaj and Ricky Martin. Other than that, we’ll see what MAC has up its sleeve that catches my attention.


From the MAC Me Over collection, I was excited for the single eyeshadows that were to be released. Once I saw them in person and swatched them, a lot of my excitement disappeared. The two (out of the six that were launched) that I did end up getting were Outre and Carbonized.

Outre ($15.00) has a Matte finish, yet the texture in unbelievably buttery (especially for a MAC Matte eyeshadow). It is also a very unique shade. It’s sort of a mustard-yellow brown. It’s not too yellow, but it definitely leans that way when you look at it compared to other browns.


Carbonized ($15.00) has a Veluxe Pearl finish, so the texture is amazing: buttery, smooth, and pigmented. It is not as unique of a shade as Outre, but it is a very good neutral smokey eyeshadow. If you want an eyeshadow that is easy to use and will give you an effortless neutral smokey eye, you need this!

Swatches of both eyeshadows:

Top to bottom: Outre, Carbonized
Other hyped and anticipated products from the MAC Me Over collection are the new fluidlines. MAC fluidlines have a cult following and are claimed to be the best gel (or cream) eyeliners on the market. Now this is my first time trying the fluidlines, and I am still not 100% sold on them. I’m so addicted to my liquid liner that I can’t seem to get the gel liners to work for me. But as always, practice makes perfect. I will definitely need to test these out some more before giving a final verdict, but for now, I’m still not sold.

Avenue ($15.00) is a darkened chocolate brown with quite a bit of gold shimmer in it. It’s actually a very pretty shade and probably the most pigmented out of the four that were released.

Dark Diversion ($15.00) is a reddish plum with a very subtle sheen to it. This shade is also fairly pigmented, and I could see it working well for those with blue eyes because the red undertones will make blue eyes pop.


Midnight Blues ($15.00) is a darkened midnight blue with subtle shimmer. This one does apply fairly sheer on the first application, so it may be beneficial to apply two layers.


Dark Envy ($15.00) is a blackened forest green with subtly shimmer. This one is also fairly sheer (probably the sheerest out of the four), so two layers may help the color payoff of this shade, as well.


By the way, another tip if you aren’t a huge gel liner user (like me) is to use these as cream eyeshadows. You can use them as a base under powder shadow, or even by themselves all over the lid. Since the formula is creamy, yet it dries down very quickly into being almost waterproof, it would work well as a cream eyeshadow.
The last few things I picked up were brushes. Now if you’ve watched my videos for a while, you know that I’m not one to go spend the money on MAC brushes. I find many of them to be overpriced, and I very rarely am in the mood to spend that kind of money on a brush. However, I do firmly believe that when it comes to MAC brushes, you get what you pay for. The quality of MAC brushes are superb and I know that with the proper care, they will last practically forever.
I’ve recently come to the conclusion that I want to build my MAC brush collection. Though it will take a lot of time and money, I will eventually have all of the staple MAC brushes. On this trip to MAC, I decided to take advantage of the fact that they released a limited edition, very sought-after brush: the 226.

The MAC 226 ($24.50) is a uniquely shaped eye brush. It is almost like a 224, but it’s tapered at the end and comes to a very distinct point. I personally really love this brush. I think it’s a very good size to blend shadows into the crease and outer corner.


The MAC 210 ($18.00) is just your standard, run-of-the-mill small eyeliner brush. It’s not too big or too small; it’s just right. I think if you like getting a very precise line with gel or cream liner, this is a must-have brush.


So that’s it for my MAC Me Over collection haul. I hope you guys liked seeing what I picked up. Please let me know in a comment what you guys decided to get from this collection.
Love you guys and I'll type to you in my next post! <3
Eshani a.k.a. TotalMakeupJunkie101